


Eedomus and Nest
From eedomus - Documentation
BEWARE: Google Nest shut down the "Works with Nest" service in August 2019.
It is not possible to create new connections.
A new service may be restored in the future, around Google Assistant.
Many other thermostats are compatible with eedomus.
Contents |
This page shows how to integrate the Nest thermostat and the eedomus gateway together.
You must first have an eedomus gateaway and a Nest thermostat installed.
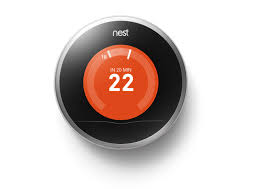
What is Nest?
The Nest thermostat is a wireless thermostat that communicates with the cloud Nest.
Adding the Nest device
The adding is done by clicking on the Add Device in the eedomus portal, like other connected objects.
Choose Nest, and click Add.
You get the details of the configuration.
Click "Click here to get your authorization code code." You are redirected to the portal Nest to confirm your acceptance.
A confirmation will make you back to the eedomus website, with the token.
Fill: Code OAuth authorization Nest
Several modules are created in your box eedomus and the Nest script.
Interactions between the two systems
The box eedomus will regularly examine the Nest API (on Cloud Nest) to check if some data has changed.
The setpoint on eedomus will operate the thermostat setponit via the Nest API within a few seconds.
You can integrate the setpoint in your programming eedomus.
Tips
Nest requires that the data retrived through its API should be erased after 10 days. So, you will not find a complete history of data eedomus.
The Nest thermostat gets the action 2-5 seconds when setpoint change.
The European Nest thermostat is different from the Nest thermostat US in terms of connection. The European thermostat is in two parts (display and relay). Both parties are required.
The relay can switch about 3 A (dry contact NO / NC). To order more power, it is necessary to use an additional relay (power contactor, relays appropriate ZWave).
Refer in all cases to the installation instructions from Nest.
Add another Nest thermostat
Open the following page (replace BOX_IP by the actual ip of your eedomus box and replace xxxxxxx by your Nest authentication code)
http://BOX_IP/script/?exec=nest_oauth.php&oauth_code=xxxxxxx&mode=verify
You will get a list of currently available thermostats.
Then copy your first thermostat and replace [VAR2] by your new thermostat identifier.
Add a Nest Protect Smoke Plus Carbon Monoxide
Open the following page (replace BOX_IP by the actual ip of your eedomus box and replace xxxxxxx by your Nest authentication code)
http://BOX_IP/script/?exec=nest_oauth.php&oauth_code=xxxxxxx&mode=verify
You will get a list of currently available smoke en carbon monoxide detectors.
Then create an HTTP sensor with the following URL:
http://BOX_IP/script/?exec=nest_oauth.php&oauth_code=xxxxxxx&smoke_co_alarm_id=xxxxx
The XPATH data to retrieve are
/nest/co_alarm_state
and
/nest/smoke_alarm_state
Comment : it is not possible to activate the alarm manually, this device is a sensor.
