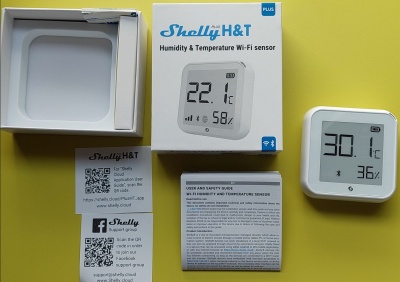
Shelly Temperature and Humidity Wifi
From eedomus - Documentation
This page describes how to connect a Shelly H&T Wifi Sensor module to eedomus. Shelly is a brand of the Bulgarian company Allterco.
This module has an e-ink screen and displays temperature and humidity.
This page describes all the steps involved in bringing up the temperature in eedomus, without installing any application on a smartphone or using any third-party Cloud.
There is also an eedomus "Shelly" module in the eedomus store (thanks KikiFUNstyle) that generates steps 2 and 3 for all types of Shelly.
This page describes a completely manual configuration, without using this eedomus blind module.
First step - Connecting the Shelly to your home Wifi
Power the Shelly H&T with 4 AA batteries or a USB-C connection (nothing is supplied).
The module becomes a WiFi access point, with a WiFi name starting with Shelly***** .
You need to connect to this access point with a laptop or smartphone. Select the Wifi ShellyPlusHT-XXXXXXXX (open network)
Using a web browser, enter the address http://192.168.33.1/
Then set up your home Wi-Fi network (SSID name and password). You can even set up 2 Wifi networks.
Once this step has been completed, you may lose your connection to the module (which we will recover in step 3).
Second step - Creating a sensor to receive the information in eedomus
We recommend creating an HTTP sensor that will not make any requests (http://localhost, XPath: //result, frequency 0 min.).
You select "temperature" type sensor, with decimal values (not a list of values).
Next, you need to retrieve the URL of the eedomus API that will be used to send the information.
In Configuration -> My account -> API identifiers, you can access the request generator. This is a Cloud request of the SET, value type.
You can test the request in a web browser by entering a fictitious temperature, for example 10.
The request is then: http://api.eedomus.com/set?api_user=****&api_secret=*****&action=periph.value&periph_id=****&value=10
The result is displayed in the eedomus interface!
We recommend using the API in HTTP mode and not HTTPS, otherwise the Shelly batteries will be consumed twice as quickly according to the Shelly doc.
Note
To save time, you can do step 2 first, then steps 1 and 3 at the same time. This avoids searching for the IP address and bringing Shelly out of sleep mode, but this page is intended to be more instructive.
In addition to the settings, you can remove Bluetooth if you're not using it.
The Shelly seems to send the same information twice in HTTP. We don't know why.
We recommend setting the variation threshold to 1°C instead of 0.5°C to save battery power.
It is possible to call the local API of the eedomus box rather than the Cloud eedomus api (http://ip_locale/api/set?...), by first setting the IP of the eedomus box locally.
Our Shelly's MAC address starts with b8:d6:1a:8b:5c:** (Espressive).
With this configuration, the Shelly interrogates the time.google.com site in addition to the eedomus API. When the button is pressed, it also polls https://updates.shelly.cloud (at Google Cloud in 2023).
Other Shelly devices are listed here: Shelly devices
More information: Configuring a Shelly module with eedomus


